Man’oushe roll

DSC01469


Hi dear followers,


I know it has been a long time since my last post. I’ve been travelling a lot between USA, AbuDhabi,  Dubai and Lebanon to see my children.

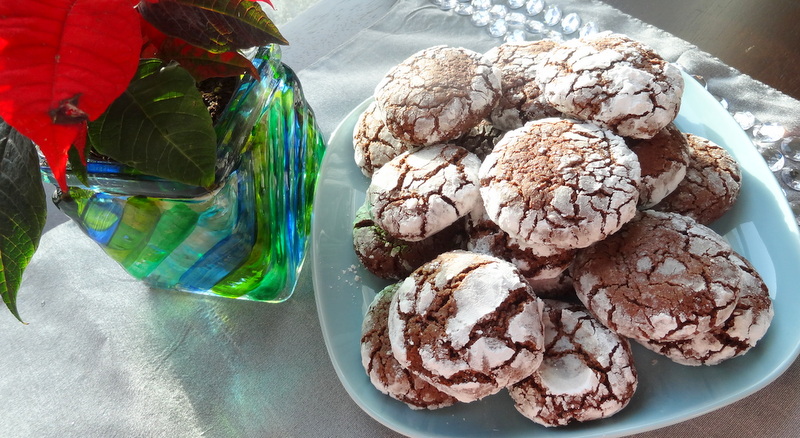
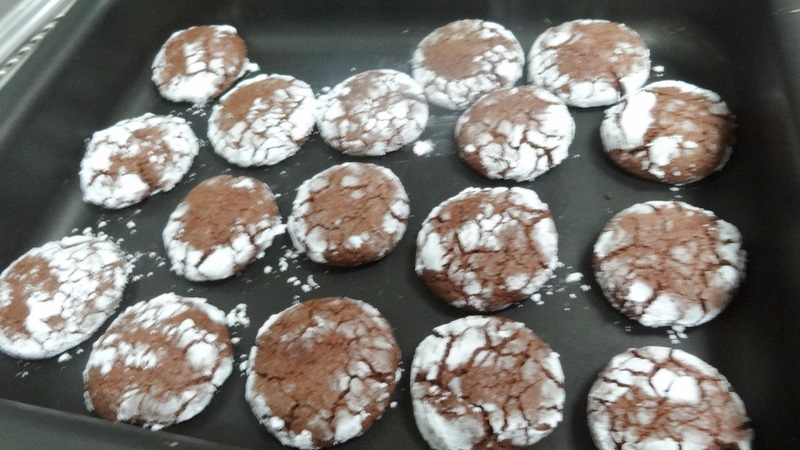
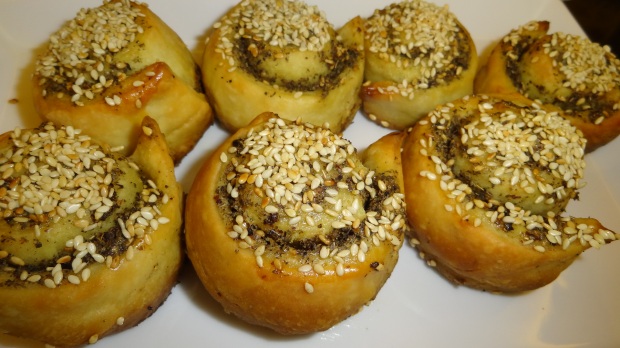
Today I am back with this recipe of rolled Man’oushe, which melts in the mouth because the dough is so soft.

I hope you will like it as much as I enjoyed preparing for my loved ones.

Ingredients:

– 500 gs all purpose flour

– 1/2 cup corn oil, plus one tablespoon

-1 teaspoon salt

– 1 teaspoon sugar

– 1 1/2 teaspoon baking powder

– 1 teaspoon instant yeast

– 1 1/2 cup natural yoghurt

– 1 cup zaa’tar mixed with one cup  olive oil

– Optional : Some milk and sesame for the decoration on the top of the roll

Preparation:

– In a bowl mix the flour with all the dried ingredients

– Add the corn oil and rub all the flour with oil

-Mix with 1/2 cup of yoghurt at a time until the mixture become a soft and smooth dough ( the quantity of the yoghurt may vary depending on the flour type)

– When your dough is ready rub it with one tablespoon of corn oil and cover with cling film and let it rest for about 2 hours until it doubles in volume

DSC01462

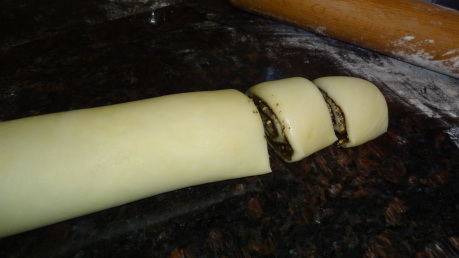
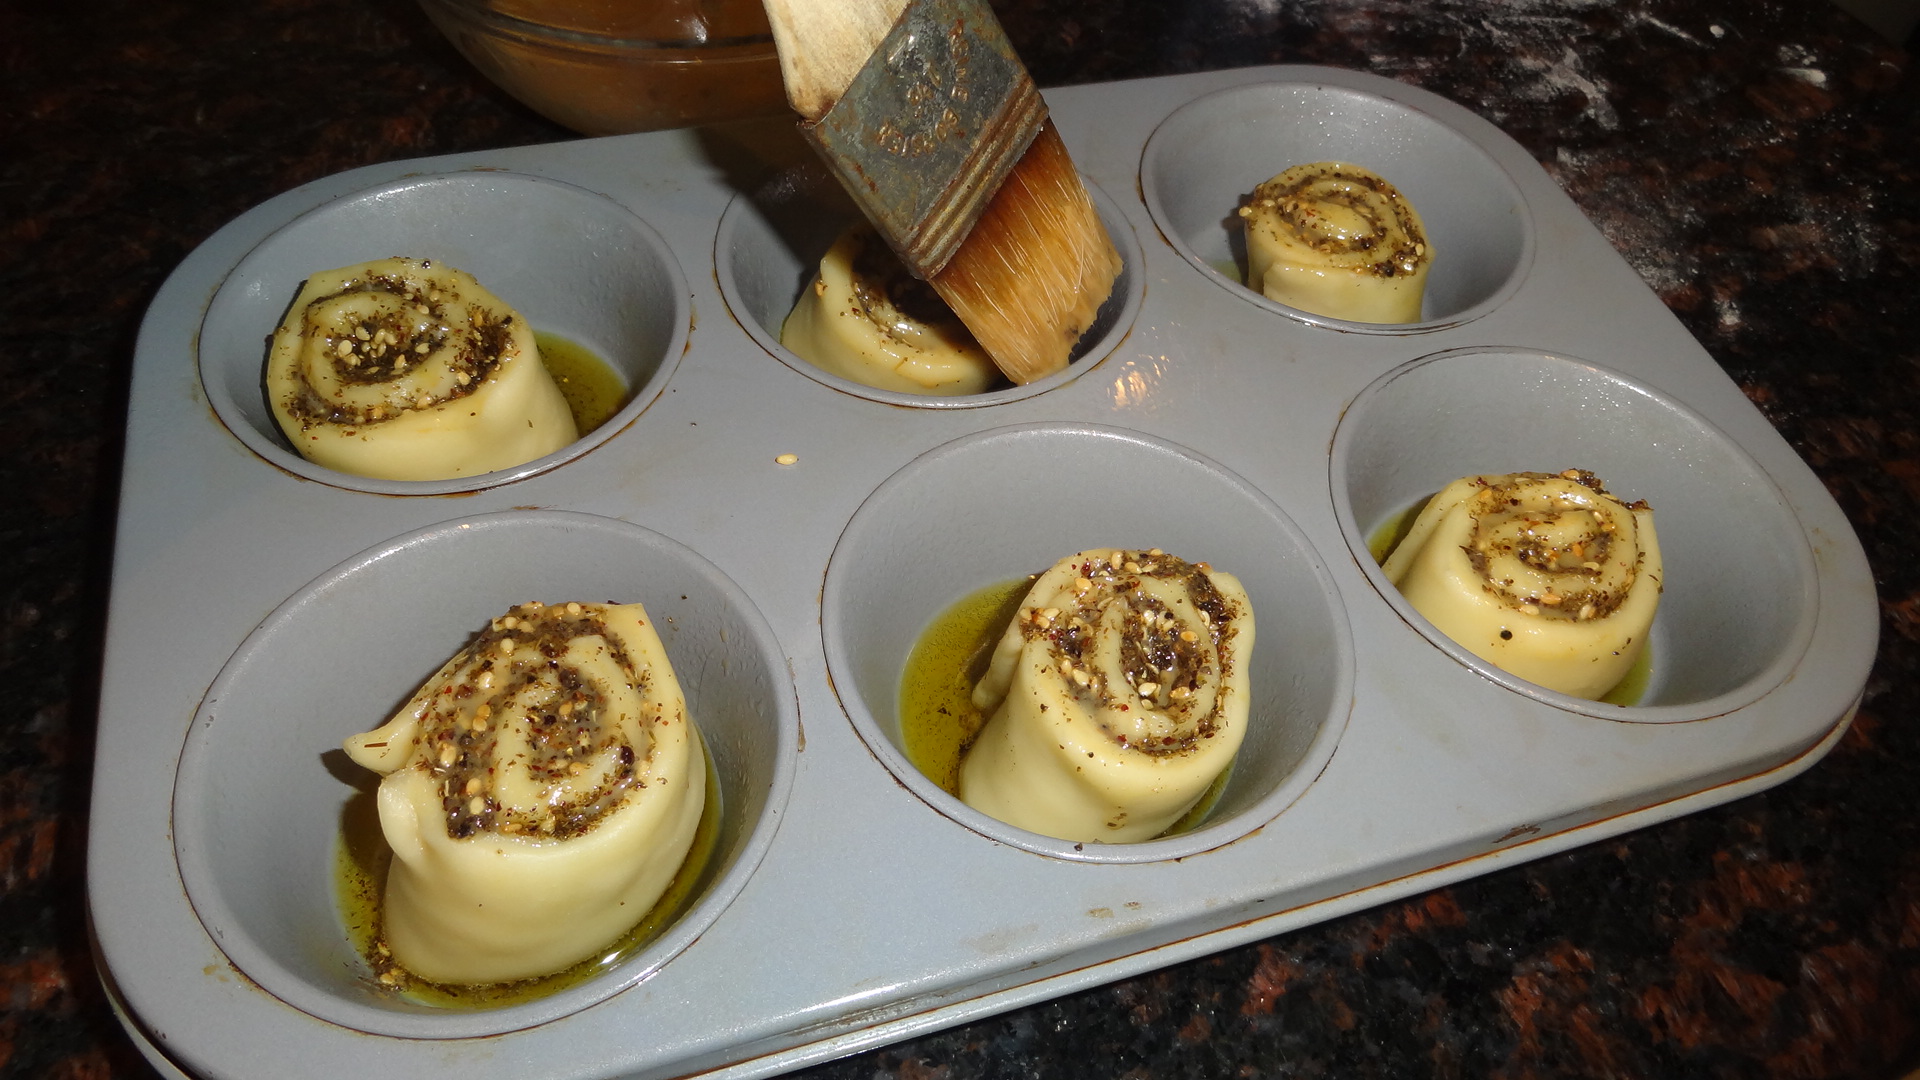
– Take a third of the dough and roll it using a rolling pin on a floured surface to a rectangle shape, pour the mixture of zaa’tar and oil and cover the dough leaving about one inch from each side and roll it into a cylinder

– Cut the rolled dough into a small pieces

DSC01464

– Preheat the oven to 190 degree

– Place each roll in cup cake tray and let it rest for about half an hour.

– If you are using sesame to decorate the top of the roll brush each one with a bit of milk and sprinkle the sesame over it

DSC01466

– Cook for 20 minutes, or until the top of the roll becomes golden color.

Et voila c’est tout…..Sahttein.

Lentil With Dough (Hara’a Ousba’ou)

hor osba'a

“Hara’a Ousba’ou” is a funny name for a dish because in Arabic it means “Burning Finger”. Despite its strange name, it is still a delicious dish. While popular in its county of origin Syria, it is still a hidden gem of Lebanese Cuisine, taking side-stage to more known dishes like hummus and mjaddara.

The lentils are cooked with home made dough in this recipe, but you can save time by using fried pitta bread instead, it works equally well.

Ingredients for the dough:

  • 1 cup flour
  • a pinch of salt
  • about 1/3 cup water (more or less depending on the flour used)

Preparation of the dough:

  • Mix the flour with salt , add the water little by little until you have a smooth dough
  • Cover with cling film and let it rest for one hour

Ingredients for the lentils:

  • one cup green lentils
  • 6 cups water
  • 2 large onions, cut into wings
  • 1 bunch of fresh coriander, finely chopped
  • 1/3 cup lemon juice
  • 2 tablespoons pomegranate molasses
  • 5 garlic gloves
  • 1 teaspoon salt
  • 1/2 teaspoon black pepper
  • 2 tablespoons olive oil

Preparation:

  • Wash the lentils, and place in pot with water, boil until tender, it will take about half an hour
  • Heat one tablespoon of olive oil in a pan, fry the onions until brown and put aside
  • Crush the garlic with a teaspoon of salt and mix with the chopped coriander
  • Heat the other tablespoon olive oil in a saucepan and fry the garlic with coriander then put aside
  • Preheat the oven to 180 C
  • Roll the dough on a floured surface to about 1/2 cm thickness, and cut into small square, place them into a slightly greased tray and bake half the quantity in the oven until they turn golden, leave the remaining uncooked

hor osba'a 1

  • When the lentil is cooked add the lemon juice, the pomegranate molasses, half the fried onions and half the fried garlic, leaving the remaining to decorate the plate
  • Adjust the seasoning to your taste, then place the uncooked dough with the lentils and let it cook on a very low fire for about ten minutes
  • Place the lentils onto the serving plate, decorate with the remaining onions, garlic coriander and the cooked dough and serve

ET VOILA… C’EST TOUT! BON APPETIT 🙂

Bitter Orange Peel Jam (Mrabba Bou Sfeir)

mrabba bou sfeir 3

As I mentioned in the previous post, we can use the peel of the (bitter) Seville oranges to make jam. This kind of jam has a mild sour taste which is delicious, and isn’t very sweet. This is another traditional family recipe that I’m sharing with you. I personally like it a lot and I hope you will like it too.

Ingredients:

  • 1 kilo Seville lemon
  • 500 grams sugar
  • 5 grams lemon salt

Preparation:

  • Wash the oranges and grate the outer shell slightly

mrabba bousfeir

  • Using a knife, cut horizontal lines to divide the peel into 6 parts, then soak them in cold water overnight

mrabba bousfeir 1

  • The next day, replace the water with fresh water and boil the peels for about 10 minutes then discard the water again
  • With a small spoon remove slowly the white of the inside of the shell, rinse them and allow to dry
  • When they are dry, weigh them; the sugar used should be the same weight as the orange peels
  • Soak again in cold water for 6 hours, changing water halfway
  • Prepare a needle and a thread, and sew each shell into a crescent shape then sew every 12 pieces together
  • Place the shells and the sugar in a pot and leave together for 6 hours

mrabba bousfeir 2

  • After allowing it to rest for the 6 hours, place the pot on a medium fire
  • Add one cup of water and boil until the sugar thickens, stirring with a wooden spoon to prevent sticking on the sides of the pot
  • Dissolve the lemon salt with 1 tablespoon water and add it to the sugar syrup, stir and put the fire off
  • Allow to cool then remove the thread from the shells and place in a jar with the syrupmrabba bou s

ET VOILA… C’EST TOUT! BON APPETIT 🙂

Kibbe Arnabiyye

kibbe arnabye 1 Kibbe Arnabiyye is the Queen of kibbe recipes. Its been kept in our family for generations and is considered very special because it can only be made in the winter when all the citrus ingredients are ripe, especially the Seville orange also known as bitter orange or Abou Sfeir in Arabic. Also, this dish is usually made for just for VIPs or loved ones. My mother used to make it in huge quantities and would send a big plate for each of her 9 sisters and brothers and had enough still to feed her 6 children and husband. This delicious recipe is very dear to me, and I am so proud to share it with you today. I do hope you try it and if you have any questions, feel free to ask in the comments. Since the procedure to prepare it is long, I prepared the kibbe balls and onions one day ahead. The day after I started cooking the dish itself. I also use the peel of the Seville orange to make jam, so don’t throw them away when preparing this dish and I will soon post the recipe. Ingredients: for the kibbe:

  • 1 and 1/2 cup fine brown bulgur
  • 300 grams  beef meat
  • 1 small onion
  • 1 teaspoon salt
  • 1/2 teaspoon seven spices

Preparation:

  • Wash the bulgur and drain it from water
  • Grate the onion until fine
  • Mix the meat with bulgur and grated onion, add the salt and spices
  • Place in a food processor a little at a time until all the quantity is used
  • Your kibbe is ready place it in the fridge until you prepare the stuffing

Ingredients for the Kibbe stuffing:

  • 300 grams minced meat
  • 2 onions, finely chopped
  • 1 teaspoon salt
  • 1/2 teaspoon seven spices
  • a handful of pine seeds (optional, but it enhances the flavor of the stuffing)
  • 1 teaspoon pomegranate molasses
  • 1 tablespoon vegetable oil

Preparation of the stuffing:

  • In a saucepan heat the oil, fry the onion until golden brown
  • Add the meat and fry with the onion for about 10 minutes, then add the pine seeds, season with salt, spices and the molasses
  • Cook for about 10 minutes until the pine seeds turn golden

Stuffing the kibbe: Your going to need an additional ingredient, a tablespoon of corn flour

  • Dissolve the corn flour in a cup of cold water
  • Make a medium sized ball from the kibbe dough with you wet hand (dip it in water and cornflour), and using your index make a hole in the ball of kibbe, and with the other hand (wet also) turn it around your index until it thins out and the hole becomes wider
  • Place 1 teaspoon of the stuffing inside and close it, turning the ball in your hand to form a nice shape
  • Your kibbe is now ready to be used in the Arnabiyye

Ingredients for the Arnabiyye:

  • 1/2 kilo kibbe balls
  • 1 kilo tahini
  • 1 kilo oranges
  • 1/2 kilo mandarin
  • 1/2 kilo Seville orange
  • 1 lemon
  • 1 teaspoon salt
  • 1/2 teaspoon cinnamon
  • 2 tablespoons pomegranate molasses
  • 1 kilo onions cut into wings
  • 2 tablespoons oil
  • 1 cup pine nuts

Preparation:

  • Fry the kibbe balls half way, for a few minutes only, then place them on a kitchen towel to absorb the excess oil and keep aside
  • Fry or roast the pine nuts and also leave aside
  • In a medium pan, heat the oil and fry the onions until slightly golden then cover with 3 cups of water and boil it for half an hour until they soften; puree them keeping the water with them
  • Extract the juice of all 3 citrus fruits and keep in a pitcher

kibbe arnabye

  • In a large pot, place the tahini, the juice and the pureed onion and mix well
  • Place the pot on a medium fire and stir constantly until it starts boiling and forms bubble on the top; when you can see the oil of the tahini coming on the surface you know the sauce is done
  • Add salt, cinnamon and the pomegranate molasses and adjust the seasoning up to your taste
  • Place the kibbe balls and boil on a very low heat for about 10 minutes
  • Pour into deep plates and decorate with pine nuts. Enjoy it warm or cold. You could have it with cooked rice if you’d like.

ET VOILA… C’EST TOUT! BON APPETIT 🙂

Happy Valentine’s Day with Red Donuts

donuts

Hi everyone,

I would like to wish you all a very Happy Valentine’s Day. Today is a day to remember those you love and to show them your appreciation; what better way to do that than by making them something sweet to eat!

My youngest son just finished his undergraduate studies a couple of weeks ago, and today he went to collect some papers from university. I wanted to surprise him with something he’d enjoy, and since its Valentine’s day and everything is red, I made some donuts and added some red food coloring to the glazing to mark the occasion though I don’t really think that donuts are romantic. I think I might have put a few drops more of food coloring than I should have because the glaze looks blood red 😛 The important thing is that it put a smile on his face.

So today remember to show your loved ones a little affection. If they’re fans of donuts, make them some of these: smiles guaranteed!

Ingredients:

  • 1 cup warm milk
  • 1/4 cup sugar
  • 1/2 teaspoon salt
  • 1/4 cup vegetable oil
  • 1 egg
  • 3 cups flour
  • 1 tablespoon dried instant yeast
  • oil for frying

Preparation:

  • In a bowl, sift the flour with instant yeast
  • In another bowl, whisk the milk, egg, sugar, salt and oil then add the mixture to the flour, mix together until you have a soft dough
  • Cover the bowl in a cling film and leave the dough to rise and double in volume, for about one hour
  • Cover the surface you are working on with flour and roll the dough with a rolling pin to about 2 cm thickness then cut into a donut shape; leave it to rest for 15 minutes
  • Heat the frying oil (enough for deep frying) and fry the donuts from both sides for about 3 minutes on each side, until they turn golden color. Place on a kitchen paper to absorb the excess oil and allow to cool before glazing them with your choice of chocolate or red glaze

donuts1

For the chocolate glaze:

  • Boil one cup of cream with 2 tablespoons sugar and 2 tablespoons corn syrup then pour over one cup of sweet chocolate chip and stir until the chocolate melts, then add one teaspoon of vanilla

For colored glaze:

  • Mix one cup of icing sugar with one tablespoon of water or milk and add few drops of food coloring

ET VOILA… C’EST TOUT! BON APPETIT!

Spaghetti With Spicy Shrimp

Spaghetti with spicy shrimp

In my pantry there is always spaghetti because it is  appreciated on our table. Yesterday my son had three of his friends at home and after studying all day, they felt hungry. Having not prepared enough food for everyone and with very short notice, I automatically  decided to prepare spaghetti. Me being who I am, I wasn’t satisfied with making just plain old pasta; luckily I had frozen shrimps in the freezer and I came up this dish with a very large bowl of salad and some appetizers.  There were no leftovers, so I think it turned out alright. Try it yourself 🙂

Ingredients:

  • 1 packet spaghetti 500 grams, the thicker the better
  • 1 bag frozen shrimps, peeled and deveined
  • 1 can of peeled and crushed tomatoes
  • 3 cloves of garlic chopped
  • 1 teaspoon chili paste, if you like it more spicy you can always add more
  • 1 teaspoon salt
  • 1 bunch chopped parsley
  • 1 tablespoon olive oil
  • 1/2 cup white wine

Preparation:

  • Boil the spaghetti as per instructed on the box then drain
  • In a saucepan heat the oil and fry the garlic until transluscent
  • Add the shrimp and fry the for few minutes until they change color
  • Put in the tomatoes, salt and chili paste and mix in with the wine; let it boil for about 25 minutes until thick
  • Add the spaghetti to the sauce and mix well while cooking
  • When well cooked, mix in the chopped parsley and serve

ET VOILA… C’EST TOUT! BON APPETIT 🙂

First Anniversary With Angel Food Cake

angel food cake

I cannot believe it! A whole year has passed since I started blogging. Time flies by so quickly when you’re having fun. When I first started writing, I wanted to share my recipes with my daughters in a convenient way since they would always ask me for help. Then, my eldest son came up with the idea of blogging so that I could post my recipes online one at a time, and eventually write enough to reach my goal of writing my own cook book 🙂

I wouldn’t have thought that blogging would introduce me to such a nice community of fine people as all of you are. You encouraged me a lot with your comments, awards and even the simple Likes. Thank you all for the kind words and positive attitude 🙂

To celebrate the occasion, I decided to bake this angel food cake and to decorate it with pistachios, fruits and chocolate sticks. I share this dedicate this recipe to all of you. Bake it yourself and have a slice on me 😉

Ingredients:

  • 6 eggs separated
  • 50 grams flour
  • 50 grams corn flour
  • 1 teaspoon vanilla essence
  • 3 tablespoons baking powder
  • a pinch of salt
  • 125 grams sugar
  • about one tablespoon butter

Preparation:

  • Preheat the oven to 180’C and butter a round cake tin and line it with wax paper
  • Whisk the egg whites with a pinch of salt and half the sugar until they form a peak
  • In another bowl, whisk the egg yolks with the vanilla and the remaining sugar until yellow pale
  • Add the flour and the baking powder to the egg yolk mix, then fold in the egg whites; do not whisk
  • Place the batter in the cake tin and bake for about 40 minutes, or until a skewer come out clean

Cream for the icing:

  • Mix 200 grams of butter softened with about 2 cups of icing sugar, add a teaspoon of vanilla and mix well

For the decoration:

  • When the cake is done, allow to cool on a wire rack then cut horizontally through the middle
  • Cover the top of the bottom half with cream the cut some strawberries in half and place them over the cream
  • Place the other half on the top then cream the sides and the top of the cake
  • Decorate with strawberries and slices of kiwi, sprinkle on the top some ground pistachios
  • I also placed some chocolate biscuit sticks along the edge to look like candles 🙂

angel food cake 1

ET VOILA.. C’EST TOUT! BON ANNIVERSAIRE 🙂

Fish Cake

fish cake

My mother insisted on feeding us fish once a week when I was little, but my brother didn’t eat fish in any form. Frustrated after trying so many recipes and failing to get him to eat fish, my mother asked our neighbor, one of her best friends, who gave her this recipe to try. My little brother looked at them and decided they looked yummy, and had a few not knowing  that he was eating fish!

My daughter had the same problem with her baby boy, so I followed mother’s trick and made this fish cake and guess what? It worked like a charm; there’s nothing like your parents wisdom sometimes. If you have the same problem, try out this recipe and let me know if it worked out for you too.

Ingredients:

  • 500 grams fillet fish ( I used hammour/grouper; use what you prefer)
  • 2 medium size, boiled potatoes
  • 1 medium size onion, finely chopped
  • 1 red capsicum, finely diced
  • 2 leaves fennel, chopped
  • zest of one lemon
  • 2 eggs, slightly beaten
  • 1 cup breadcrumbs
  • 1 tablespoon olive oil
  • 1 teaspoon salt
  • 1/2 teaspoon black pepper
  • one cup canola oil for frying

Preparation:

  • Preheat the oven to 180 C
  • Place the fish in a tray with a pinch of salt and a dash of pepper until cooked
  • In the meantime heat the olive oil in a saucepan and fry the onion until slightly colored
  • Mash the potatoes, mix with fennel, capsicum, onion
  • When the fish is grilled, chop it in small pieces and add it to the potato mixture, season with salt and pepper and add the lemon zest
  • Place the beaten eggs in a plate, and the breadcrumbs in another one
  • Make small balls from the fish mixture and flatten it with your hand, dip it in the eggs and then roll it in the breadcrumbs, until all the quantities are finished
  • Heat the canola oil and fry the fish caked until golden for few minutes, then turn them on the other side too

ET VOILA… C’EST TOUT! BON APPETIT 🙂

Cracked Chocolate Cookies

chocoate cracked biscuit 1

Making cookies is something I enjoy a lot because watching my children’s happy faces while eating them is priceless. This recipe especially is something else. During the Christmas vacation, they requested of me to make these cookies, as it had been years since I had made them last… and believe me, as soon as the cookies came out of the oven, half of them were already gone! I also made new fans with my grandkids.

What else can I say? You’re going to love them too.

Ingredients:

  • 2 eggs
  • 1/2 cup soft butter+1 tablespoon
  • 6 tablespoons cocoa
  • 1  2/3 cup sugar
  • 2 teaspoons vanilla
  • 2 cups flour
  • dash of salt
  • 2 teaspoons baking powder
  • 1 cup chopped walnuts (optional)
  • 1 cup icing sugar

Preparation:

  • Melt the better and stir in the cocoa, allow it to cool before adding the sugar, eggs, the vanilla; beat well
  • In another bowl, sift the flour with salt and baking powder then add it to the cocoa mixture and add the walnuts if you’d like.
  • Place in the fridge for 1/2 hour then preheat the oven to 180 C
  • Take a small piece of dough, shape it into a ball, roll it in icing sugar
  • Place on an ungreased tray, bake for about 9 minutes, The center should remain moist
  • Allow to cool and enjoy (or eat them warm)

chocolate cracked biscuit

ET VOILA… C’EST TOUT!  BON APPETIT 🙂

Omelette With Zucchini

omelette with zucchini

Whenever I make stuffed zucchini, I keep the cored insides to cook them as I did in this post, or to prepare an omelette like were going to do today. The zucchini gives the omelette a very nice flavor that my family just loves.

Ingredients:

  • about 2 cups of zucchini insides
  • 1 small onion, finely chopped
  • 4 eggs
  • 4 tablespoon flour
  • 1 teaspoon salt
  • a dash of ground cinnamon
  • 1/2 cup chopped parsley
  • frying oil

Preparation:

  • Mix the eggs with all the ingredients
  • Place the batter in the fridge for about one hour to settle
  • Now to cook them you have two choices:
    • Either you fry them in small batches
    • Or you place the batter in an oiled tray and bake in the preheated oven for about thirty minutes until the top becomes golden
  • Enjoy eating with a mixed vegetables salad

omelette with zucchini 1

ET VOILA.. C’EST TOUT! 🙂